

How to Set and Reach Your Goals for the New Year with this DIY Vision Board that Actually Works
In this post, I will show you how I set clear goals for the new year, broke them into smaller, quarterly milestones, and the best way for you to make your own DIY vision board to help you reach your goals.
Life has been more full of chaos than usual and there are a lot of changes on the horizon for our little blended family. I have felt myself needing to reset more frequently and there has been this constant feeling of being overwhelmed.
With the distractions and the feelings of being pulled in every direction, I needed a way to realign with my goals. Additionally, I needed to find a practical way to ensure that I achieved them. I wanted to stay motivated into the new year. I was looking for something that would actually work!
So, I did what us ADHD-ers do best. I hyper-focused until I found a solution - a DIY Vision Board!
In five basic steps, I laid out my entire vision board for the next year:
2) Breakdown Your Long Term Goals into Quarterly Steps
3) Build the Vision Board Base (and What You Could Do Differently)
5) Reflect on Your Goals Daily
I have provided a helpful FREE download so that you can outline your goals into quarterly milestones as well.
This post contains links to my Amazon Storefront. As an Amazon Affiliate, I earn money from qualifying purchases at no additional expense to you.
What are Quarterly Goals (and Why They Actually Work)
One thing to note, in order for this to work, you will need to divide your annual long-term goals into four quarters. This makes your goals so much more manageable and keeps you focused without overwhelming you. It increases the odds that you will actually reach your goals. I show you how to do this effectively down below.
Why Setting Goals Visually Helps You Stay Focused
Visuals, especially when already meaningful to you, or when you can place yourself in them mentally, are SO effective for reaching your goals. Visual cues help you reinforce motivation when life gets too chaotic. They are especially effective for the people who think creatively or struggle with focus. The visual representations are a reminder of the simple steps you should be taking everyday.
Why DIY a Vision Board
While I am a huge fan of vision boards, my brain looks at all the photos and affirmations tacked up and it makes me feel overwhelmed. It’s difficult for me to make sense of. Placing the visuals strategically and having a physical barrier for each quarter keeps things aligned perfectly. I am able to intentionally focus on one thing at a time.
How to Make a Vision Board That Aligns With Your Goals: The Step-by-Step
Step 1: List Your Long Term Goals
Start by listing out three main (very vague), long-term goals. These are the goals that you want to reach within the next year. Mine were written out like this:
1) Create a Successful Blog
2) Improve my Health
3) Improve my Finances
Step 2: Breakdown Your Long-Term Goals into Quarterly Steps
As mentioned earlier, breaking down your long-term goals into quarterly goals, helps provide some structure to your vision. Four quarters is also an easy number to work with and easily divisible or multiplied. This makes it easy to plan a lay out for your board.
You can use my FREE downloadable goal planner, here. It makes it easier to break goals down and provides you with good outline for your vision board.

Step 3: Build the Vision Board Base (and What I Would Do Differently)
Research the Board that Works for Your Space
I started by researching DIY vision boards. I was not a fan of the pre-made vision boards showing up in my searches. They weren’t able to be easily separated visually and the ones that I had found seemed expensive.
Although, if I had it to do over, I would do it differently. I have looked into a few of these options available on my Amazon Storefront.
Full transparency, I ended up completely overestimating the amoun t of available space to hang a vision board of the size I wanted. If I hadn’t skipped this step, I could have adjusted and scaled back.
Measure Out Your Physical Goals/Quarters
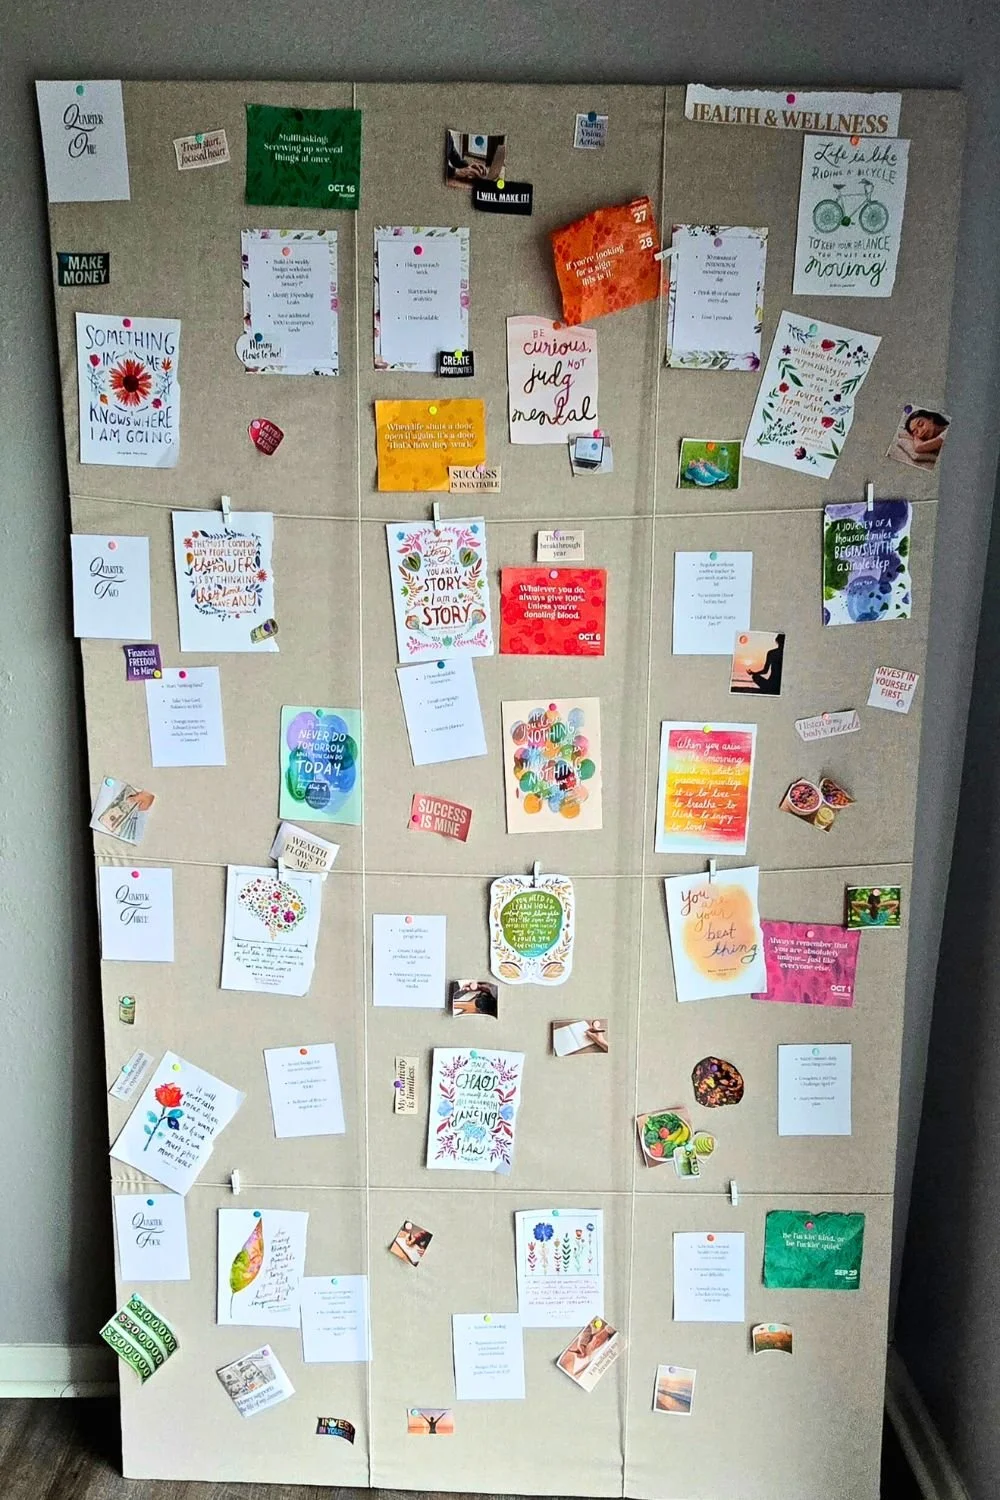
The vision board will essentially be a solid base separated into equal sized squares, however its going to end up fitting into your space. For me, what was visualized as being wall hanging, turned into a standing board separated into 4 equal rows (each quarter) and 3 equal columns (my goals). You have options, which makes this great!
My vision board was made from inspiration I found on Pinterest, using a giant piece of foil board, covered with cloth and cord bought at Hobby Lobby. All in all, I spent around $30. Besides the fact that this turned out way bigger than I thought, the fabric wouldn’t attach and the staples kept falling out.
Again, here is the link for the Amazon Storefront if you would rather go that route.
Here is what my vision board turned out like after wrapping the front and sides in cloth and trying to staple the cloth edges to the back. I also ran cord along the board to create a visual border for my squares, but you could also use tiles or something like ribbon or washi tape.
4) Make Your Goals Visual
Do Even More Research
This step is where you will learn to break down your quarterly goals. For example, if your goal is “Get in Shape Without Spending Extra Money by the End of the Year” you will need to know how to get there. The biggest reason for people not achieving their goals is because it becomes too overwhelming or there is lack of planning.
Research and find ways to work for you. Use the Goal Planner to organize. Suddenly your “Get in Shape Without Spending Extra Money” turns from general to specific.
Write the Goals Out
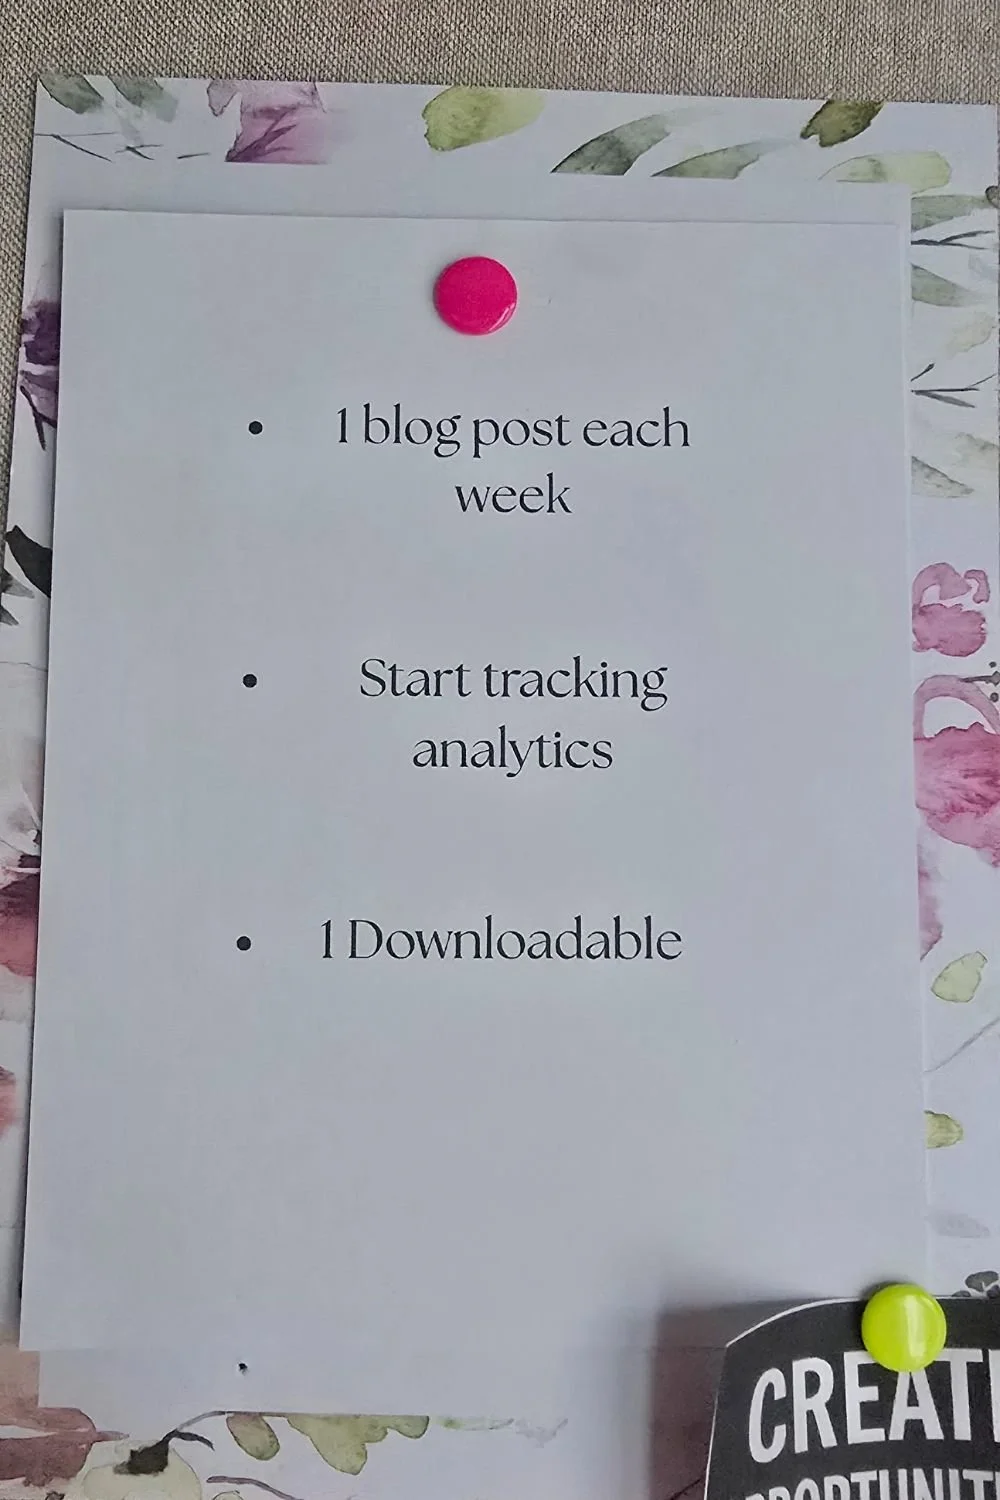
The main items you’ll want pinned up to your board are the quarterly steps you made that breakdown each goal. I would write (if you have neat handwriting) or print them on small pieces of cardstock. I like this better than regular printer paper because it’s more durable.
You can do this however you want, but I wrote mine as specifically as possible without any dates. The best part about making the goals quarterly is that you will already have a date to hit your goal by, and that’s the last date of each quarter (March 31st, June 30th, September 30th, and December 31st).
I had 3 milestones written during each quarter for each of my goals. However, if more feasible you can do one milestone, two milestones, etc. For example, here is what one of my quarterly steps look like:
Going back to the “Get in Shape by the End of the Year” goal, this might be how you would breakdown your goal into quarters.
Quarter 1:
Walk 30 minutes intentionally every day
Start a habit tracker
Build a Workout Playlist of YouTube Videos or TikToks to prepare for Quarter 2
Start a Journal to document what is working and what isn’t
Quarter 2:
Add a stretching routine
Complete a 20 minute weight lifting routine twice a week based off of playlist
Journal everyday on my progress
Research a healthy eating plan in preparation for Q3
Quarter 3:
Turn one daily walk into a cardio workout
Follow a healthy eating plan three times a week
Add a meditation routine once a week
Quarter 4:
Turn another daily walk into a cardio workout = (2) 30 minute cardio workouts per week
Lift weights 3 times per week
Yoga workout once per week
Meditate 2 times per week
Find Visual Representations of Your Goals
This is the part where you scour magazines, old photos, books, online quotes, or whatever you want to find visual representations of how you see your goals playing out. If you do your own, I recommend printing them on photo paper or heavier stock paper.
You want to include both affirmations, regular photos, and text.
Lay Out Goals and Photos
In the simplest way possible, take the items you cut out and lay them over the vision board to ensure not only that everything fits, but that the images you pin align with your goals for the quarter. See here:
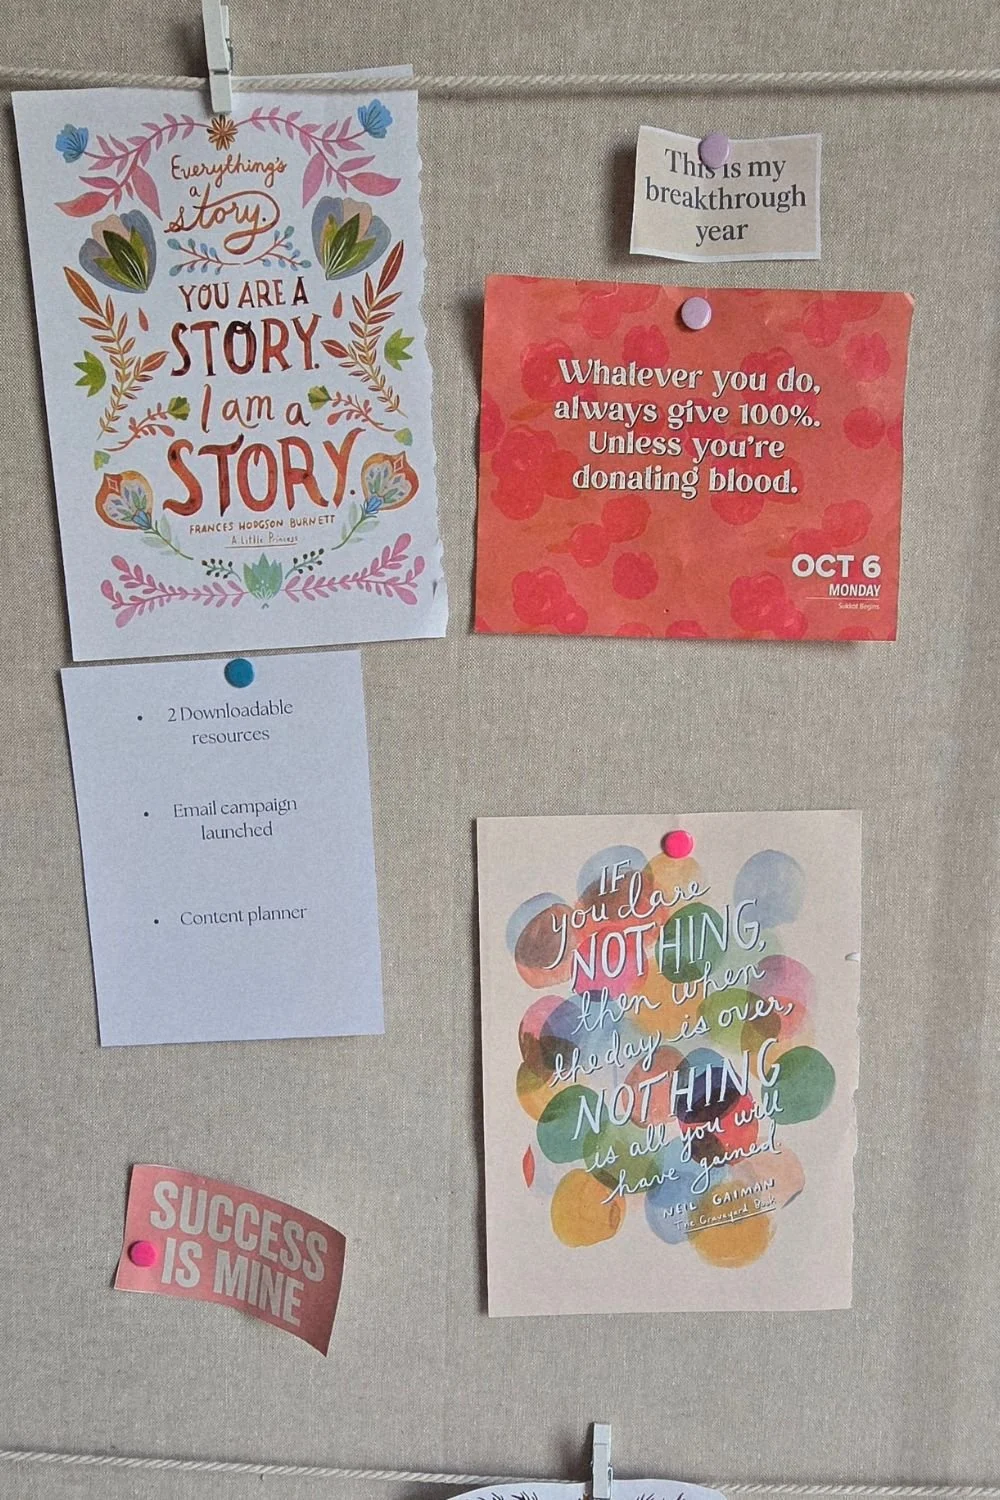
You can see by this photo of my Q2 Blog Goals Square that I have my specific goals listed out and that they are surrounded by relatable affirmations, text, and images.
5) Reflect on Your Goals Daily
With your goals visually sectioned out, pinned, and your board decorated, now it is time to put vision to action.
Reflect on your goals daily, whether it’s you journaling, meditating, or reading them over while you drink your morning coffee. The premise behind vision boards is that the they keep your goals front and center and you will intentionally take action every day to make your goals a reality.
For the moment, my board is standing along a dining room wall because we may need to find a new place for it soon. *Fingers Crossed* However, you could put this anywhere that you spend a significant time.
Final Thoughts
My favorite thing about this vision board is that it was customizable. It serves as a daily reminder and keeps my goals front and center every day. It also breaks my long term goals down into simple, achievable steps. I would love to hear thoughts on other vision board ideas.
My Amazon Storefront contains products that I would use if I were doing it again. You can shop here:

Don’t forget to download my free Goal Planner sheet so you can start making your own Vision Board!